This guide walks you through how to spin up a web3-native ecommerce website like the one we built at web3investors.xyz that will enable you to sell any type of digital good—ebooks, PDFs, movies, online courses, audiobooks, 3D metaverse assets, NSFW content, etc.—as a token-bound asset (i.e., the files are encrypted and immutably attached to an NFT).
When you’re done, your site will take crypto or credit card for payment, and your buyers won’t even need to own a wallet to purchase your token-bound asset. After purchase, your buyers will be able to unlock and consume the content directly on your site, or on any app, marketplace or platform that integrates the Darkblock Protocol.
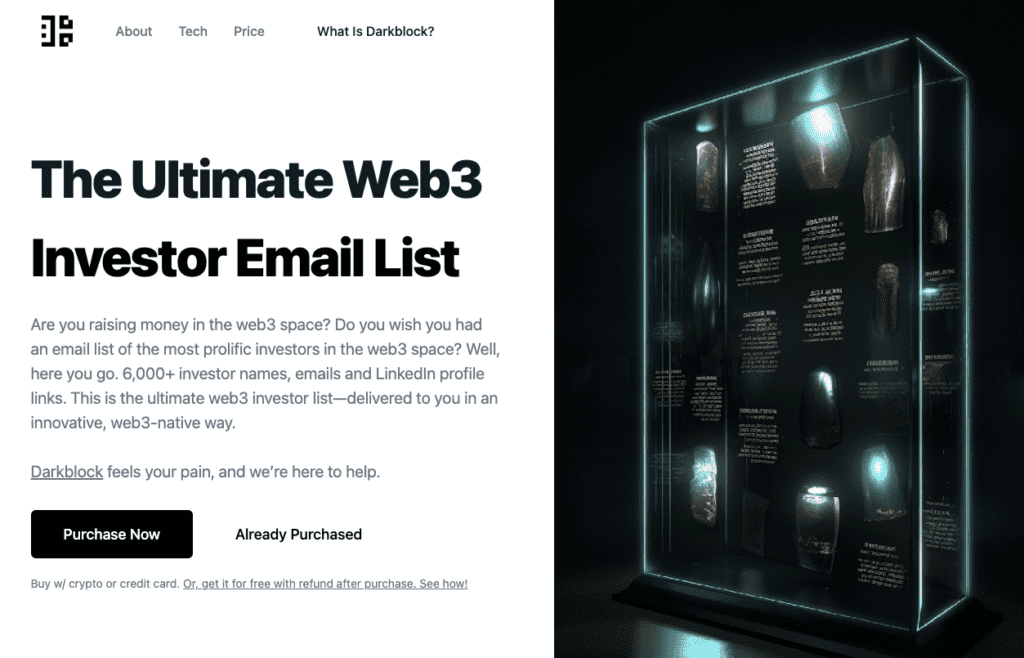
We built web3investors.xyz—where you can purchase a list of 6,000+ names and emails of web3 investors in the form of token-bound .csv and .xlsx files—for two reasons. First, we know fundraising is hard and we wanted to help other web3 founders in their fundraising efforts. Second, after compiling the list for our own use, we realized it offered a great opportunity to showcase how our tech enables anyone to sell any type of digital content or other asset in a web3-native way.
Token-bound assets come with certain benefits, especially when compared with the centralized token-gating model.
- Portability—The encrypted files, and their encryption keys, travel with the NFT (i.e., if someone sells your token, they lose access to the attached files)
- Composability—The files are composable with any app that integrates the Darkblock Protocol. For example, a third-party app scans a user’s wallet for token-bound MP3 files attached via the Darkblock Protocol and lets the user play them on their Alexa device). It’s like Loot—remember that project?—but entire digital files are composable rather than just traits.
- Decentralized—The files are stored on Arweave, a decentralized content “blockweave,” which allows users to access the files on any app or platform that integrates the protocol, on a creator’s website via an easy iframe embed of the Darkblock Viewer, or even on OpenSea via Darkblock’s Chrome extension. Since the files aren’t tied to any one platform, they are free from centralized platform risk, unlike token-gated content, which disappears if the platform or website hosting the content and the “gate” shut down (as happened when the token-gating platform, Rally, shut down recently, and will happen in a few months when Orvylle completes its shuttering).
- Censorship-resistant—The files are censorship-resistant. They’re not owned and controlled by a platform, which can make whatever edits it wants without telling you. Once the files are encrypted and stored on Arweave, they’re immutable.
- True ownership—By introducing decentralization into how digital assets are stored and accessed, buyers of these NFTs (both via primary and secondary sales) have a sense of true ownership of the content they buy, which is untrue in the web2 model, where content platforms like Kindle and Apple Movies control the files and sell users the illusion of ownership.
Token-bound assets realize one of the fundamental promises of the web3 movement—shifting from a platform-centric model (i.e., Kindle, Audible, Apple Movies, OnlyFans, etc.) to a user-centric model where the content’s owner owns the keys and decides where they connect their wallet to unlock and access the files.
This is the future of digital assets, the future of content, and the future of the decentralized web.
Getting started
Here is this project’s repo, which you can clone and dive into, but read through this guide to learn what other pieces you need to put it all together. Keep in mind that this project will require some technical skill. While we’d like to create a no-code solution for spinning up these sites, we’re not quite there yet. Using Thirdweb and Darkblock are fairly straightforward and definitely doable for non-devs, but Step 5 (i.e., where you need to create the Access Page) is where it gets technical. If you don’t know what “Yarn install” means, you’ll need to enlist the help of a dev to get your site past the finish line.
Overview
As you build your website, you will use the following tools and tech platforms:
- Darkblock’s Protocol & App—to encrypt, store on Arweave, and immutably attach digital content or other assets to your NFTs
- Thirdweb—to deploy the contract and mint the NFT
- Paper—to create a Purchase Page where customers can buy your token-bound digital asset with an email address (which will create a custodial wallet) and a credit card, or with crypto and their non-custodial wallet.
The website consists of three main parts:
- Sales Page—to describe your product and deliver your sales pitch
- Purchase Page—generated by Paper to sell your token-bound digital content
- Access Page—where buyers can unlock and access their newly purchased content
Step 1 — Create your Sales Page
This step is up to you. You can use any website as a sales page. This is where you describe your content or digital product and why people should buy it; this is your sales pitch. If you succeed in getting your prospective customer to click the “Buy now” button, they’ll be sent to the Purchase Page we’ll create in Step 4 where they can purchase your token-bound content.
For web3investors.xyz, we used this react landing page template designed by the talented Issaaf Kattan.
Step 2 — Create your NFT with Thirdweb
In this step you’ll deploy a contract to the blockchain of your choice (in our example, we use Polygon), determine the price of your NFT, and mint the first token from the collection.
- Visit Thirdweb’s dashboard and connect your wallet. (Note: Make sure you pay attention to which wallet you use during this step as you will need to connect with the same wallet in step 2 when you use Darkblock to encrypt and attach assets to your NFT.)
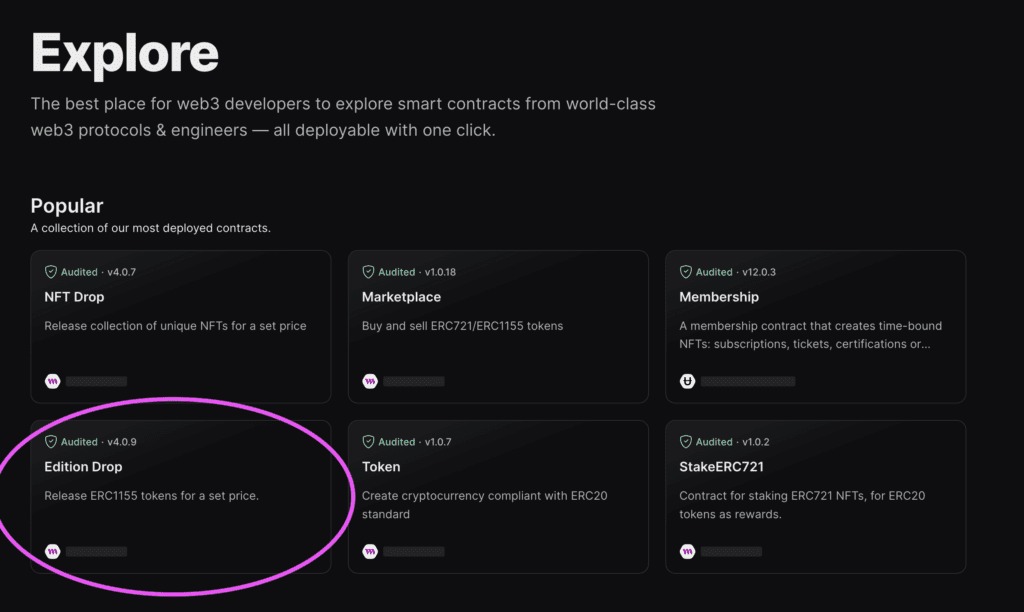
- Select “Browse Contracts.”
- In our example, we’re selling editions of a single token, so we’ll need to deploy an ERC-1155 contract. Select “Edition Drop” from among the different contract options.

- Feel free to read more about Thirdweb’s Edition Drop contract in its docs. Once you’re ready select the blue “Deploy Contract” button in the top right of the screen.
- Fill in the contract details:
- Give your NFT a name
- Provide a description
- Upload an image that will be used to represent the NFT when seen in marketplaces and other web3 apps
- Set the wallet addresses that will receive funds from primary sales, as well as the recipient addresses for royalties collected on secondary sales
- Select the blockchain to which you want the contract deployed. Because this is an ERC-1155 contract, we’re operating in the Ethereum ecosystem, so you have a choice between deploying to Mainnet, a Testnet or other EVM-compatible chain (e.g., Polygon, Optimism, Arbitrum, Avalanche, etc.). In our example, we used Polygon.
- Select “Deploy Now.”
- Mint an NFT (“Single Upload” button in the NFT’s section of your contract)
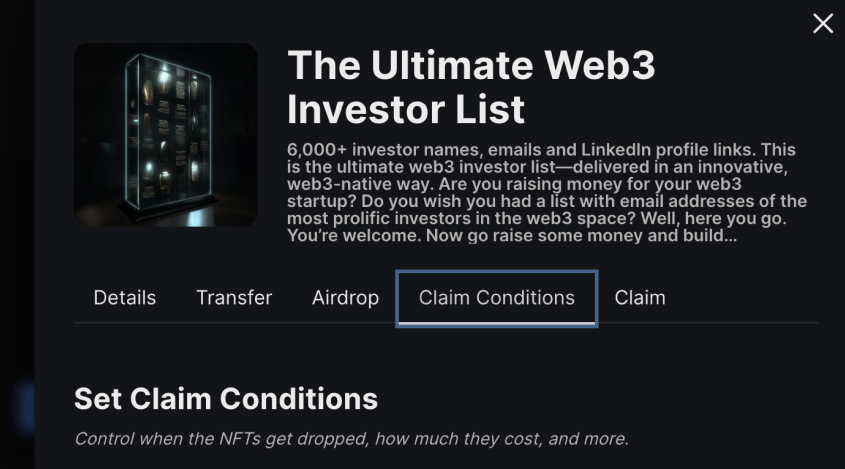
- Set the “Claim Conditions”
- Finally, you will need to claim a token for yourself. This is important because you need one NFT to be on-chain so you can upgrade it with Darkblock encrypted content in the next step. Do this via the “Claim” tab next to the “Claim Conditions” tab.
Step 3 — Use Darkblock to create your token-bound content
In this step you’ll use Darkblock’s app to encrypt and attach your digital files to the NFT you created in the previous step.
- Go to Darkblock’s app and connect with the same wallet you used in Step 1. When connecting, you’ll have the option to select your chain. Darkblock supports five chains—Ethereum, Polygon, Solana, Avalanche, and Tezos. In our example, we used Polygon, but select whichever chain you opted for in Step 1.
- You need to find the new NFT you just minted to your wallet. To do this, you can click on “My NFTs” in the main nav bar, which will take you to a gallery view of all NFTs in that wallet. If you don’t have a lot of NFTs in your wallet, this is a quick way to navigate to the NFT in question. If you used your degen wallet and have as many NFTs as I do, you can use the Search option on the main nav bar—just enter the chain, contract address, and token ID to be take directly to your NFT.
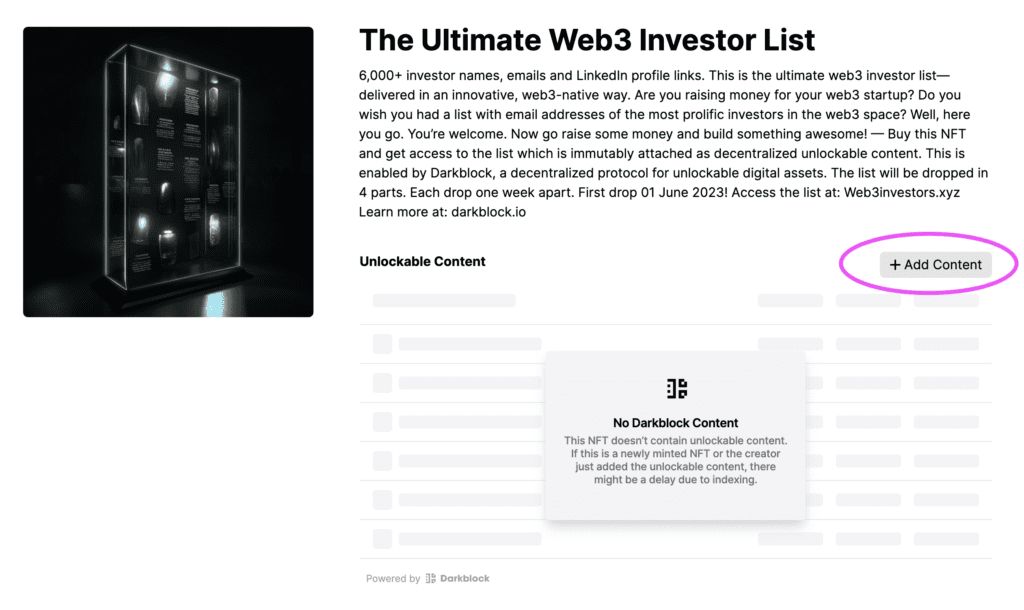
- Once you select the NFT, the detail page will have the NFT’s image on the left, the description in the top right, and the Darkblock Viewer below that. There won’t be any content there, but you’re about to add some. If you connected with the same wallet you used to deploy the contract, then you should see an “+Add Content” button above the Viewer to the right. Click on it. (Note: Because we’re selling an ERC-1155 token, which allows you to sell editions/copies of the same token, we only need to upgrade that single token ID with the unlockable asset/assets. Everyone that then buys an edition of that NFT will get access to the assets.)
- Select the digital file you want to attach to the NFT, give it a name, optional description, and select whether the file is downloadable or not. Darkblock supports any file type, which means you could sell anything: music tracks, videos, EPUB files, PDFs, 3D files, etc. (Note: You can also upgrade entire contracts/collections. If you go to “+Upgrade” in the main nav bar and select “Upgrade a Collection” from the dropdown menu, you can attach content to an entire collection or to specific portions of the collection by selecting specific token IDs or even traits.)
- Click “Create” and sign with your wallet.
- Congrats! You have now successfully used the Darkblock Protocol to bind your digital content or product to your NFT.
- Next let’s get ready to sell these sweet NFTs!
Step 4 — Create the Purchase Page with Paper
In this step, you’ll create the page where your customers will purchase your digital content or product.
- Go to Paper’s website and connect to the dashboard. If this is your first time using Paper, you’ll need to sign up for a developer account.
- Go to “Contracts” in the “Checkout” section. Here we will be importing the contract we deployed with Thirdweb.
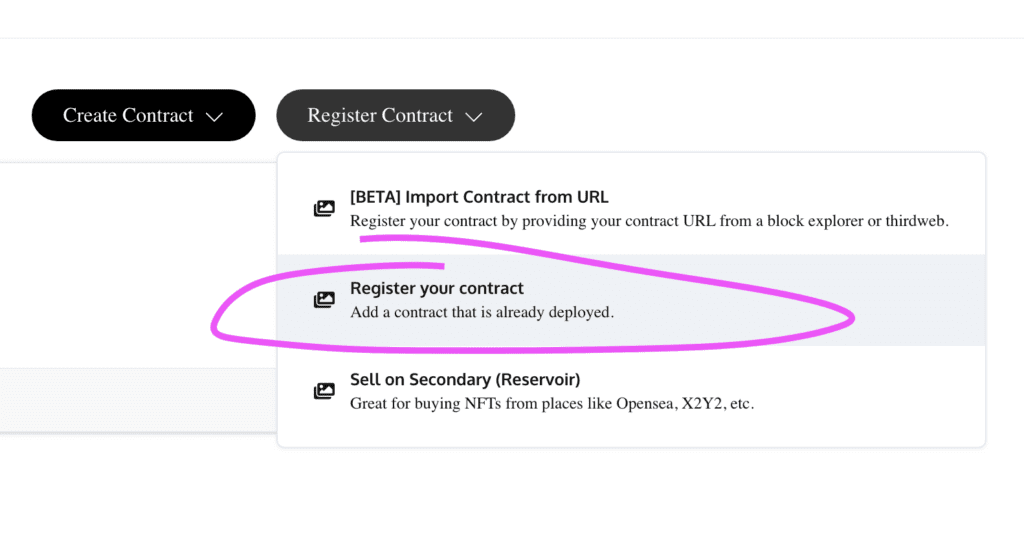
- Click on “Register Contract” and select “Register your contract” from the dropdown menu
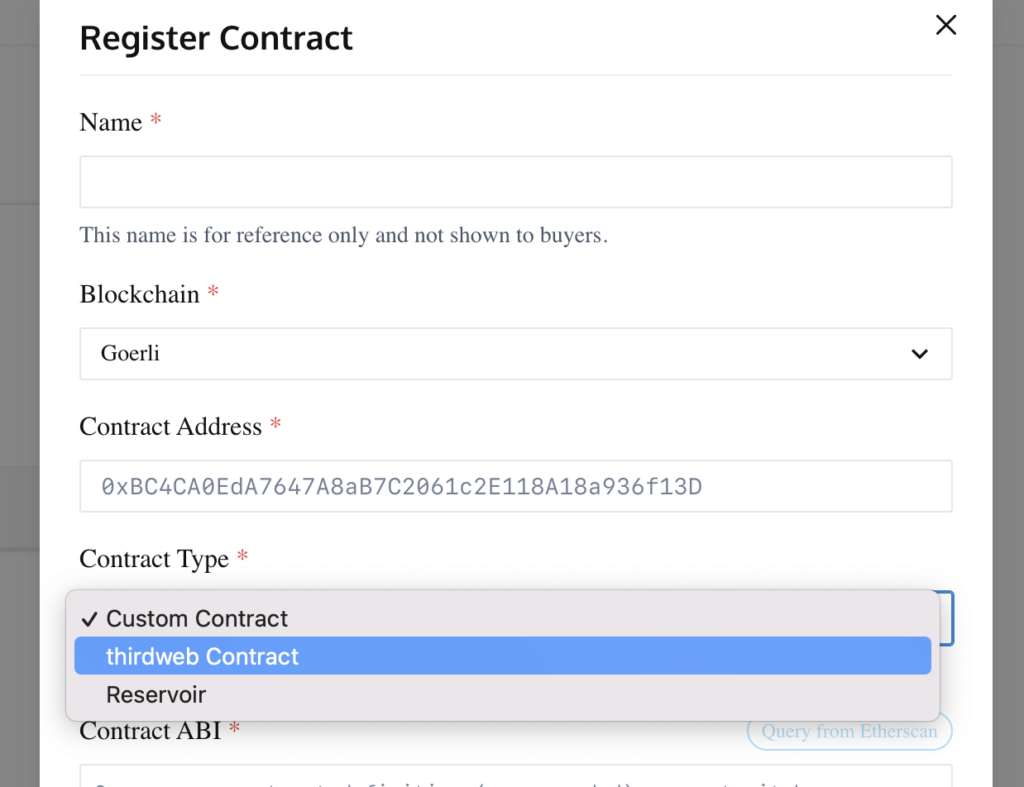
- Fill in the information about the contract you deployed on Thirdweb.
- Under “Contract Type,” select “thirdweb Contract” from the dropdown.
- Click “Register.”
- Click on “Register Contract” and select “Register your contract” from the dropdown menu
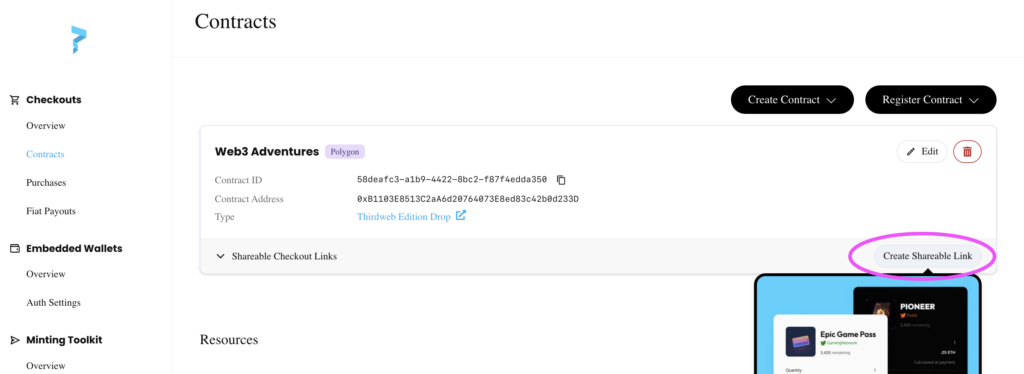
- You now have a contract you can use to create a link to your Purchase Page. On the Contracts page, find your new contract and click on the “Create Shareable Link” button on the far right.
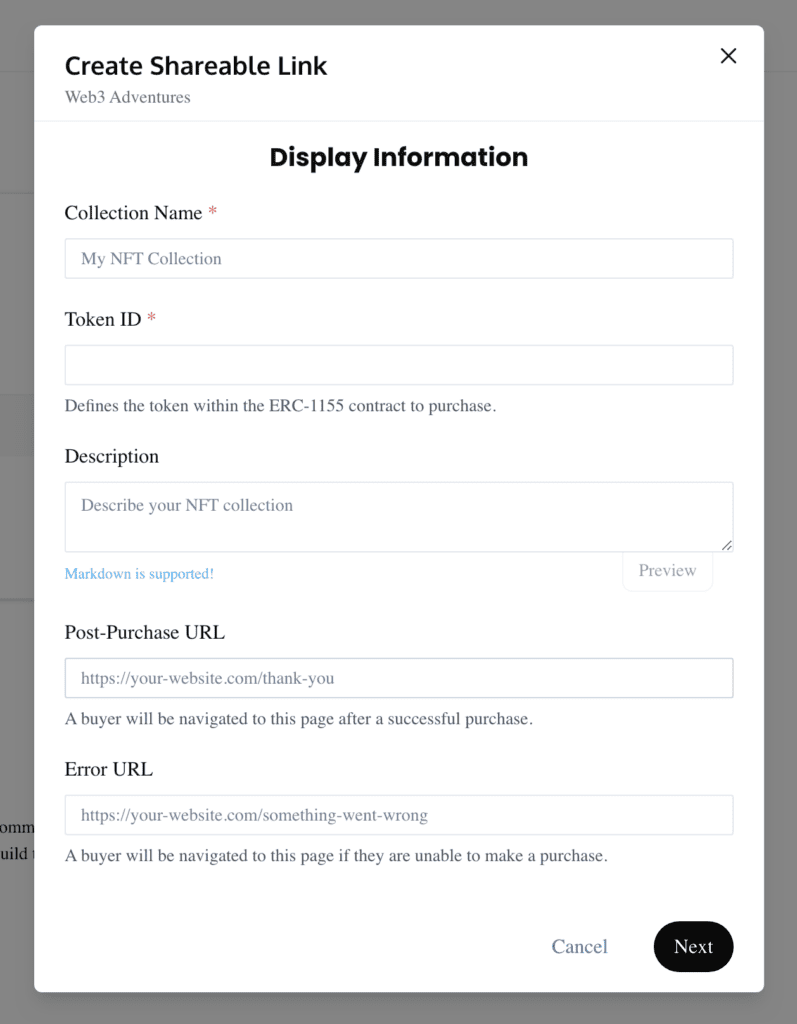
- Fill out the information that will be visible on the Purchase Page. You’ll notice there’s no where to set a price—that’s because you already defined the price when you set up the “Claim Conditions” for the NFT on Thirdweb. If you need to edit or create new claim conditions, return to Thirdweb and navigate to the contract you deployed. Any changes made there will be reflected on your Purchase Page.
-
- Enter the “Post-Purchase URL.” This will be the link to the “Access Page” on your website, which we’ll build in the next step, where your customers will be sent after a successful purchase to unlock and access the encrypted assets you attached in Step 2. It should use the “?successful=true” flag, so: yoururl.site/?successful=true. For example, for the Ultimate Web3 Investor List, the Post-Purchase URL is: https://access.web3investors.xyz/?successful=true
- Enter the “Error URL.” This will be the link to the error page on your site where a buyer will be sent if they’re unable to make a purchase. It should use the “?successful=false” flag, so: yoururl.site/?successful=false. For example, for the Ultimate Web3 Investor List, the Error RL is: https://access.web3investors.xyz/?successful=false
-
- After you have completed these steps, the link to your Purchase Page is complete. Test it out to make sure it works.
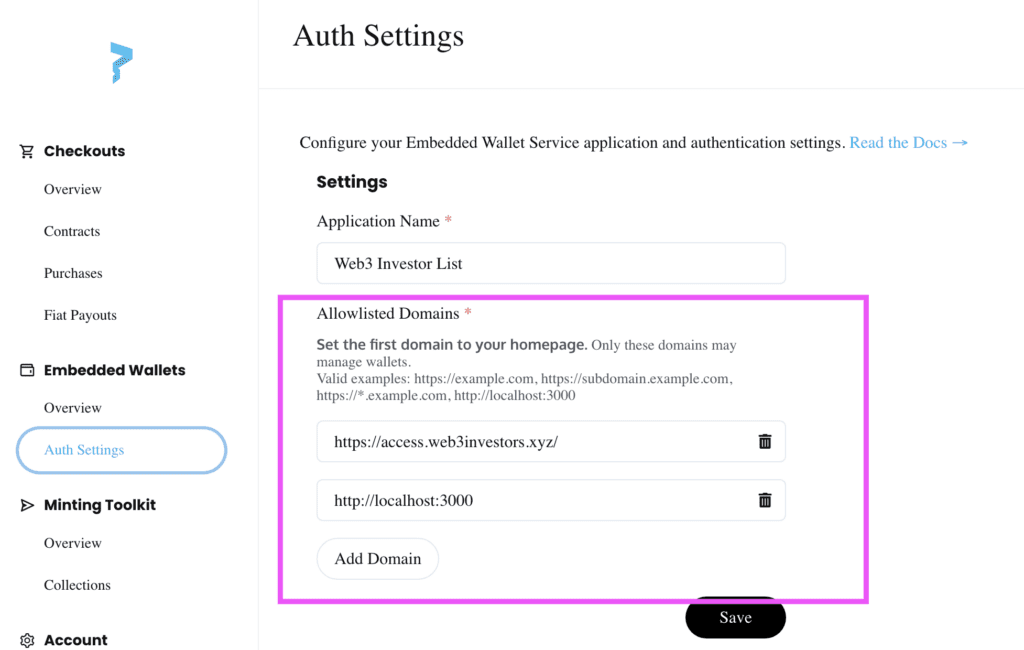
- Next look under the “Embedded Wallets” section on the lefthand sidebar and select “Auth Settings.”
- Under “Allowlisted Domains,” add the URL to your Access Page (i.e., the Post-Purchase URL you entered a few steps ago) so that buyers who use a credit card and an email address to create a Paper custodial wallet can connect to your Access Page and sign to prove ownership of the NFT.
- That’s it!
Step 5 — Create the Access Page
In this step, you’ll create the page where a buyer is automatically redirected post-purchase and will be able to unlock and access the digital files you attached to your NFT. If the purchase fails for whatever reason there is an error message and a button that takes them back to the Purchase Page to retry the purchase. If it is successful the user is prompted to connect with the wallet they made the purchase with. On this page we are using Thirdweb’s Connect Wallet Button component and because it supports Paper email wallets, even those who bought using email can just type in their email address and connect with a Magic link they get sent.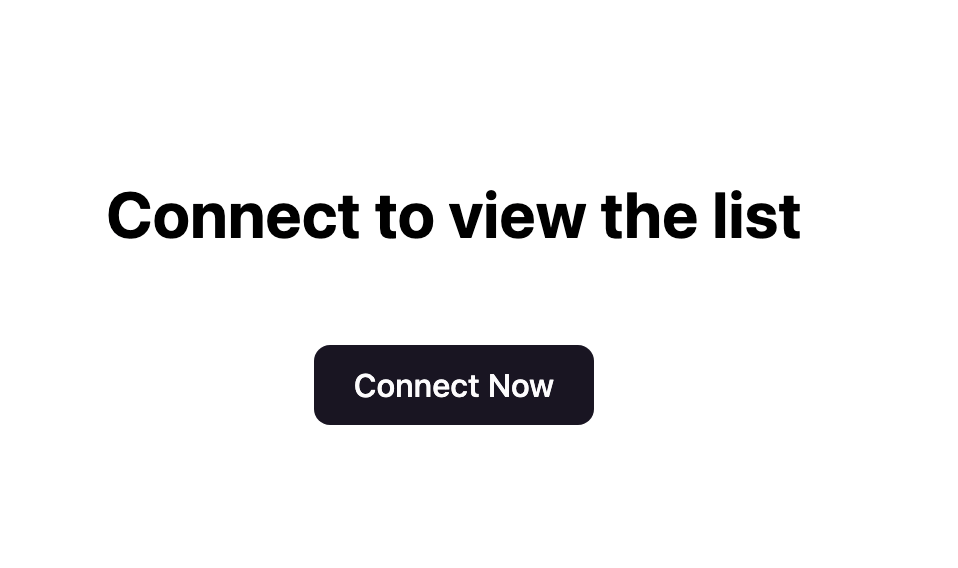
After they have connected, they can access the Darkblock unlockable content that is being delivered to them via the Darkblock Viewer in just an easy iframe embed.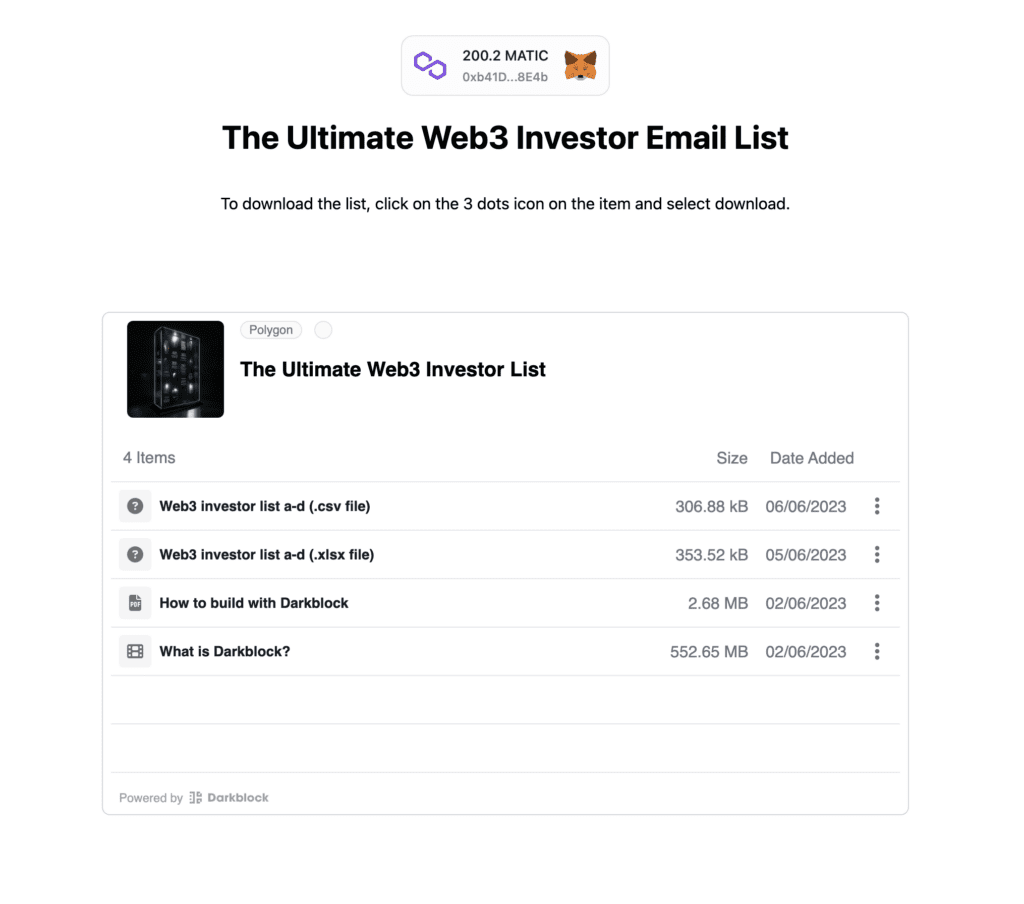
(Note: If you’ve made it this far w/out problems, but don’t know what “Yarn install” means, this is where you may need some assistance.)
- Start by cloning the Access Page repo
- Yarn install
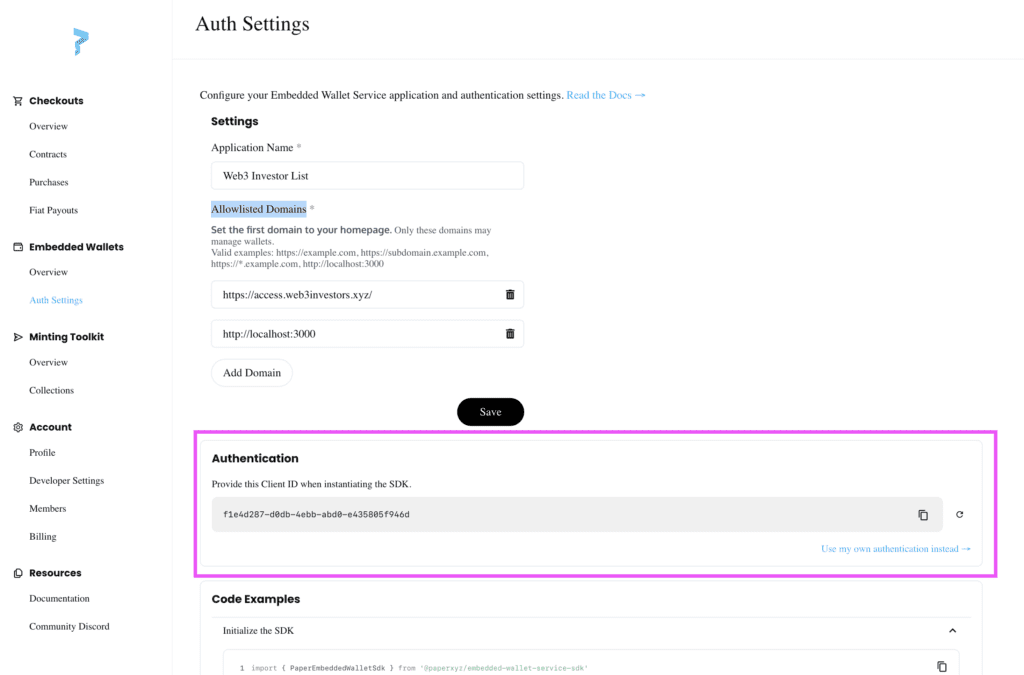
- Login to the paper dashboard and get the clientId from the auth section
- Pass the client id to the paperWallet function in the ThirdwebProvider configuration in your application (the Access Page).
- Modify the config object
- Add your contract address and token id
- Pick a blockchain you are working on
- Add the URL to your paper minting site
- Modify the MESSAGES object to reflect your needs.
- Deploy the page to netlify or vercel for example
- Done.
Summary
And that’s it. That is how you create a web3-native digital asset e-commerce site. Token gating is so web2. This is the only thing that makes sense if you want to sell digital assets that you and your buyers expect to be permanent. This is just the beginning of this revolution. Learn more at darkblock.io and if you have any questions join the Darkblock discord and we’ll do our best to help you out.
Good luck!
Here’s the GitHub Repo again: https://github.com/darkblockio/web3-native-ecommerce-template